3. Basic page
Basic pages and structured pages will form the majority of general content pages on your site.
The basic page offers the simplest type of page and is suitable for:
- a single topic
- content that can be displayed to the user in a single view.
Learning outcomes
At the end of the topic, you will be able to:
- Create a basic page
- Insert content
- Insert links
- Insert in-line images
- Apply best practice to edit content
- Use the WYSIWYG editor
- Publish content.
Essential guides
Check the guides before completing each task:
- Basic pages
- Headings – learn how to write good headings and ensure you follow the correct hierarchy
- Links – how to write good link text, and the difference between relative and absolute links
Basic page guide
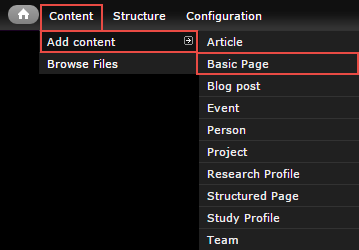
In the administration menu, go to Content > Add content > Basic page.
The edit screen displays.
- Title – page title.
- Summary – optional. Displays in teaser and card views where the page is referenced in a list. Doesn't appear on the page.
- Body – the main content on the page.

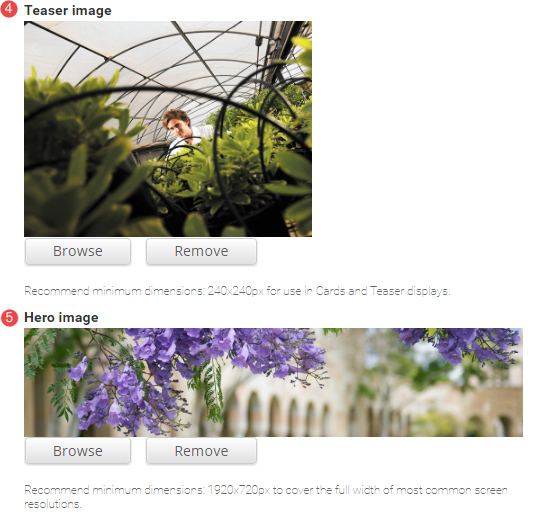
- Teaser image – Optional. Displays in card and teaser views. Advice on images.
- Hero image – Optional. Replaces the default page header with a hero banner header.
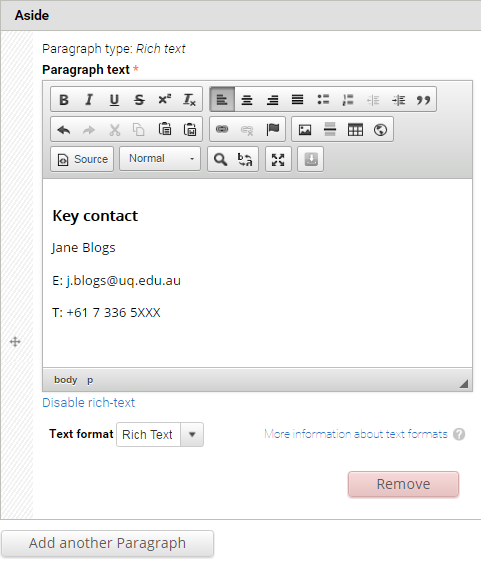
- Aside – Optional. Used for content that is tangentially related to the Body content, such reminders or contact details. Click Add new paragraph to create an Aside.

The Aside field displays.
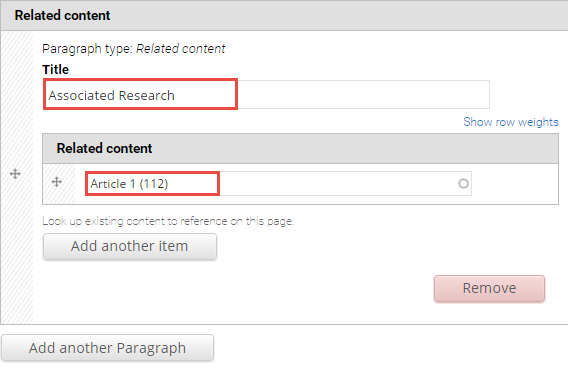
- Related content – Optional. Allows other pages on the site to be referenced in a short list. The relationship is manually created, not inferred from any data such as tags. Click Add new paragraph to create a related content group.

The Related Content fields display.
Title – Optional. Heading to label the related pages. e.g. "Associated research", or "See also".
Related content – Reference to other pages on the site. Type the first few letters of a page title to look-up the desired page. Multiple related pages can be added.
- Tags – Click the dropdown arrow to select a tag from the list of vocabularies and their terms to categorise the content.

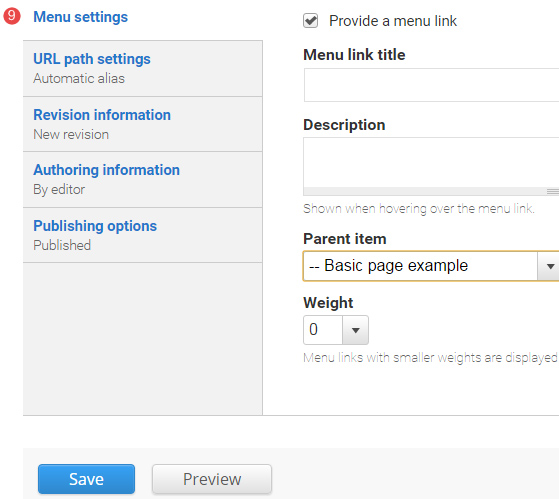
- Menu Settings – Tick provide a menu link to display the menu settings options. Adding a page to the menu ensures it will appear in the site map.

Enter the menu settings fields.
Menu link title – The menu link title is automatically populated from the basic page title. The menu link title can be edited.
Description – Content entered in the description field will be displayed when hovering the cursor over the menu link.
Parent item – Selection of a parent item ensures improved website navigation by displaying a breadcrumb trail at the top of the page.
Weight – Select a weight to determine the order of the menu link in the Parent Item. Menu links with smaller weights are displayed before links with larger weights. Tip: easier to drag the links into position to change the order.
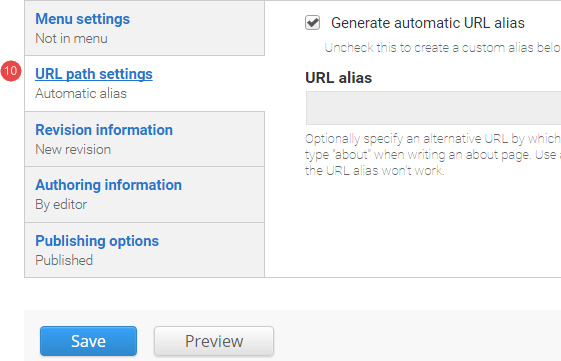
- URL path settings – a friendly URL is generated automatically if the tick box remains ticked.
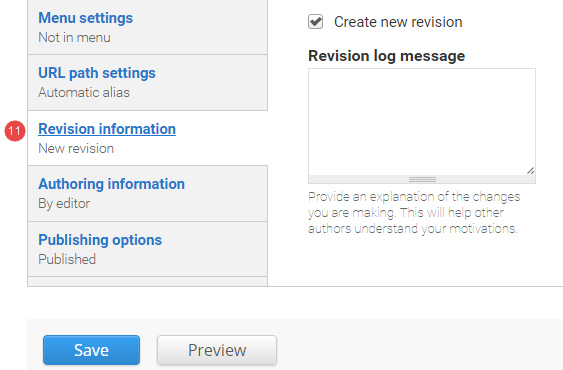
- Revision information – if 'create new revision' remains ticked, a new version of the basic page is saved each time after it is published. The versions are accessible from the revisions tab.
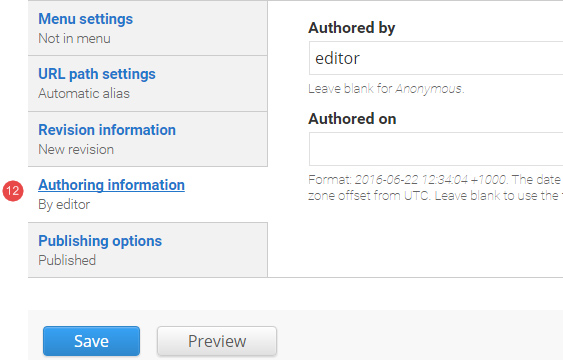
- Authoring information – The information of the author is recorded. After the basic page is saved, the "Authored on" field is updated.
- Publishing options – Click the tab Publishing options to finalise the publishing settings.
To publish – The published field is automatically ticked. Keep it ticked to publish.
To create a draft – untick published to save as a draft.
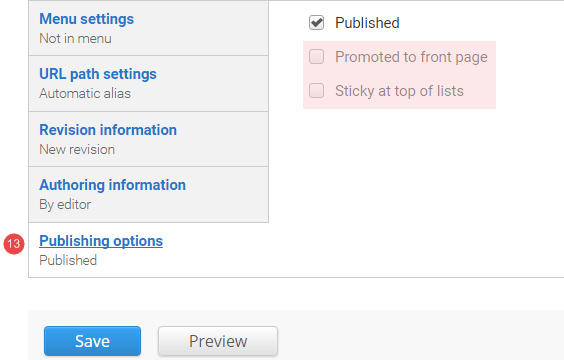
- Save – Click Save to update the basic page.
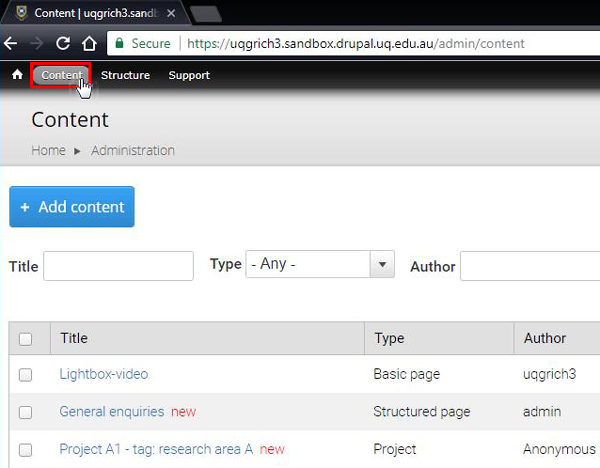
Finding basic pages in your site
To view unpublished and published pages in your sandbox site, click content in the administration menu.
Tasks to complete
For the basic page topic, there are 3 tasks, each of which require the following:
- Create a basic page.
- Complete the instructions for each basic page
- Publish the basic page
After completing each basic page, there is a review stage that consists of the following:
- Compare your published basic page with the Review associated with the task.
- Review Training page 2 on your training website where a view has been inserted to display basic pages that have the tag, sample basic page, added.
6. Review: in-line images
Compare your basic page with the following:
- Published basic page
- Component display on Training page 2- view: vertical content list: teaser
Published basic page
The numbered information that follows refers to the image below.
- Hero image - background hero image inserted.
- The page title is styled as heading 1 (H1) and the headings in the body field uses H2 to H6.
- Breadcrumb - the breadcrumb appears because the menu link was added to the basic page via the Menu options when creating the basic page.
- Page tabs
- View - displays the published page
- Edit - editable version of the page.
- Revisions - list of saved versions of the page at different times.
- Heading Elements - Image use is heading 2 while Example 1 and Example 2 are heading 3.
- List - The list describing how the use of images should be an unordered list since it does not reflect a sequence of steps.
- Menu links to sibling and children pages.
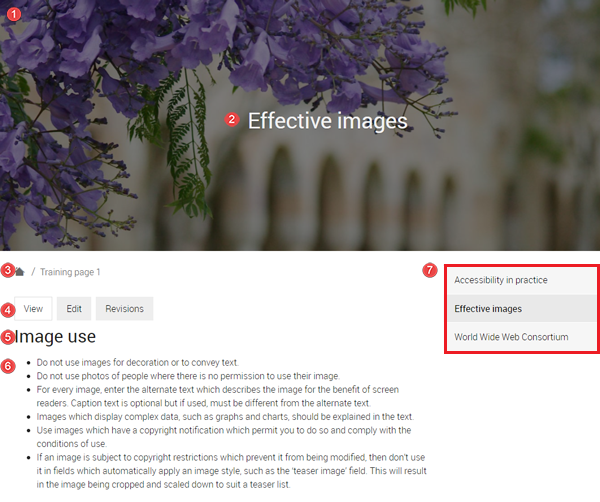
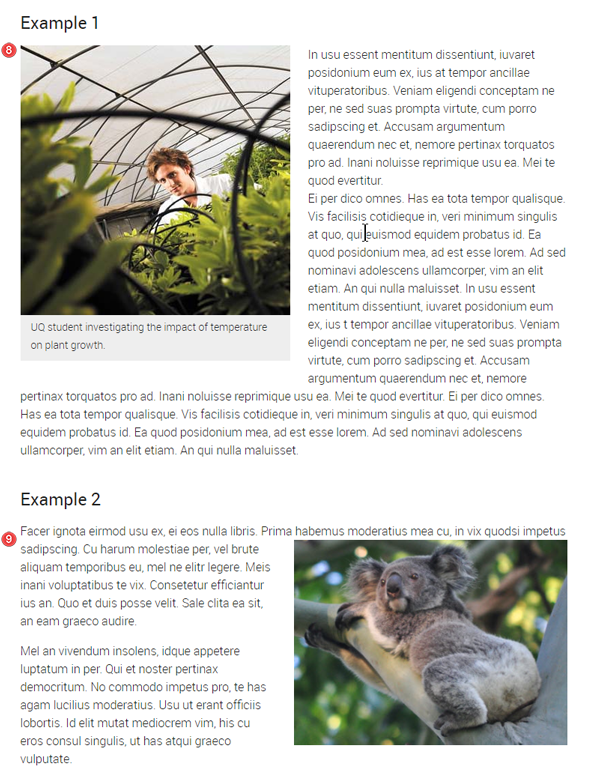
- Images - example 1 - left aligned image with alternative text and a caption
- Images - example 2 - right aligned image with alternative text and no caption
Component display on Training page 2- view: vertical content list: teaser
Purpose: to show you what happens if you do not tag your content. This view has been configured to display the teasers of basic pages where the tag - sample basic page has been added.
The basic page, Effective images,
- does not display in the vertical content list: teaser because the tag - sample basic page was not added

Click the grey button on the right to proceed to the next task.
Avoid using Microsoft Edge or Internet Explorer for Drupal training.